Best Surprising Foods You Can & Cannot Freeze. If you’ve ever found yourself staring at a half-empty container of milk and wondering if it’s still safe to drink or if your kid won’t touch leftover peas, but they’ll scarf down the frozen kind, here is some good news: Yes, you can freeze milk-and most other foods.
Freezing can be an excellent strategy for helping you save money by buying in bulk and keeping food from going off. Here’s a list of 83 best surprising foods you can and cannot freeze to help you get started.
You may have been told that you can’t freeze certain foods, but it turns out that many of them are just fine. In addition, there are some surprising foods that, surprisingly enough, can be frozen without any problem at all.
It includes vegetables and fruits and meats, and other types of food. There’s something for everyone on this list! Some food doesn’t fare well in the freezer—and others do just fine when thawed and served cold.
Before we launch into this story about freezing foods, a few quick tips: Make sure that meat is tightly wrapped so that juices don’t drip into other foods in the freezer; this will help maintain flavor and avoid cross-contamination (it’s also crucial for safety).
Foods You Can Freeze
Herbs, spices, butte, chocolate chips: They’ll stay fresh in the freezer forever—or at least until scientists find a tastier seasoning. Frozen herbs are great for cooking–measure how much you need before putting them in your stew or sauce.
Milk and cream: You can freeze most types of milk for about three months, though heavy cream has a shorter shelf-life.
Onions and garlic: Store in a cool place outside the refrigerator; whole heads are better than chopped because they won’t dry out as quickly when you take them out of the freezer.
Dairy
Dairy foods are foods that come from milk. This includes items like cheese, yogurt, and butter. Milk is a dairy product that separates into solid and liquid components when skimmed.
1. Butter
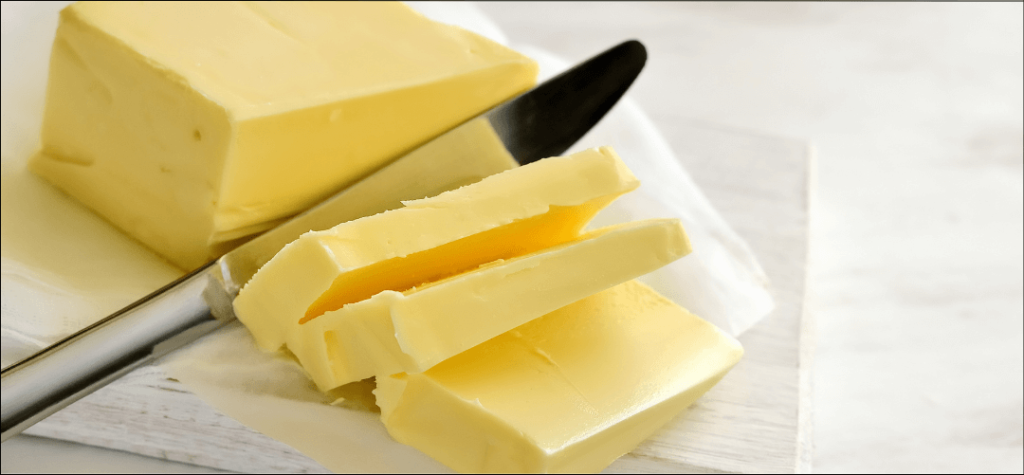
Butter is dairy that can be frozen. You should wrap it in plastic to avoid leaking into other food items. Butter will stay fresh for about six months when frozen. When thawing butter, you should be cautious because the butter may not spread evenly.
Wrapping a stick of butter in aluminum foil and putting it in a freezer bag or container is the easiest method to freeze it.
However, if you want to preserve more than one stick of butter, lay them out side by side on a baking sheet and leave them in the freezer until firm before placing them in a freezer bag or container.
2. Cheese
Cheese is a great dairy item that you can freeze. However, you should wrap it tightly in plastic or place it inside a freezer bag because if the cheese sticks to itself, it will be hard to separate the pieces after thawing.
3. Cottage Cheese
Cottage cheese is a kind of dairy that may be frozen. It’s best utilized in prepared cuisine rather than salads or sandwiches.
4. Egg Whites (Must Be Raw)
You can freeze egg whites as long as they are natural. It would be best to freeze your egg whites in freezer-safe bags or containers and then thaw the whites-only when you’re ready to use them.
5. Ice Cream
Ice cream is dairy that you should place in a freezer-safe container and then put into the freezer. You can remove your ice cream from its container before placing it in the freezer, but keep the lid and the carton because otherwise, water will form around your ice cream as it freezes.
6. Milk

You can freeze milk, but you should drink it within three months because the taste diminishes over time. It’s preferable to keep it in freezer-friendly containers or plastic bags. You should be aware that when you are thawing milk, if it is warmed to about 40 degrees Fahrenheit, the bacteria in the milk can grow.
7. Whipped Cream (sweetened in individual serving dollops)
You can freeze whipped cream in individual serving bits and place them in freezer-safe bags, but be aware that you must perform the whipped cream immediately when it is thawed.
8. Whole Eggs (follow these extensive prep notes here)
You can freeze whole eggs as long as you use the refrigerator method. It’s recommended to separate your egg yolks from your egg whites first and then place them in freezer-safe bags or containers.
Meat, Poultry, and Seafood
Meat, poultry, and seafood are all great items to freeze. You should wrap them tightly in plastic or place them in a freezer bag. It would help to use caution when thawing them because they may leak.
The most convenient way to freeze them is to spread them out on a baking sheet, freeze them until stiff, and store them in a freezer bag or container.
9. Bacon
Bacon is a type of meat that you can freeze. Nevertheless, it would be best to be cautious when you are thawing bacon because the bacon may not be evenly cooked.
Wrapping a piece of bacon in aluminum foil and putting it in a freezer bag or container is the easiest method to freeze bacon. Because the fat will stay together when frozen, you must keep it from drying out.
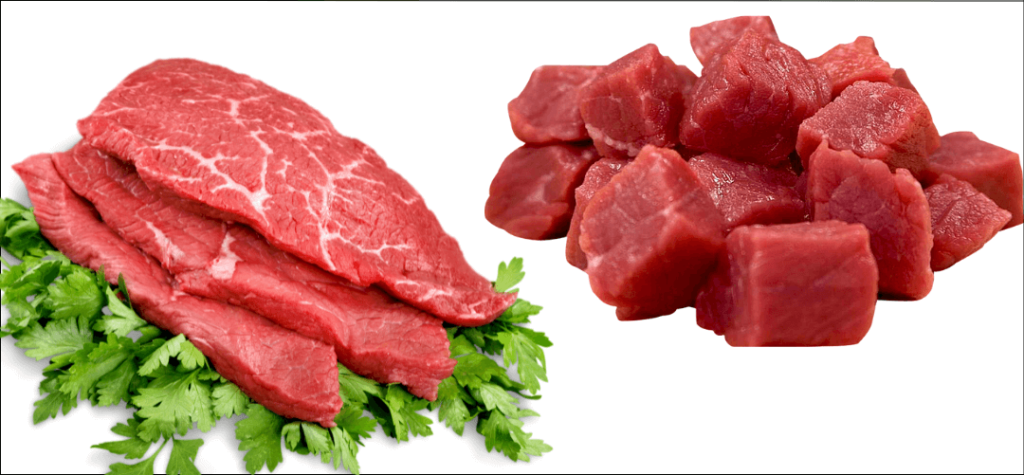
10. Beef
Beef is one of the meats that can be frozen. Meat may be frozen in various forms, including roasts, steaks, stew beef, and ground beef.
When you are thawing beef, you should be cautious because it may not be evenly cooked. The best way to freeze beef is by wrapping a roast with aluminum foil or putting it in a freezer bag.
11. Chicken
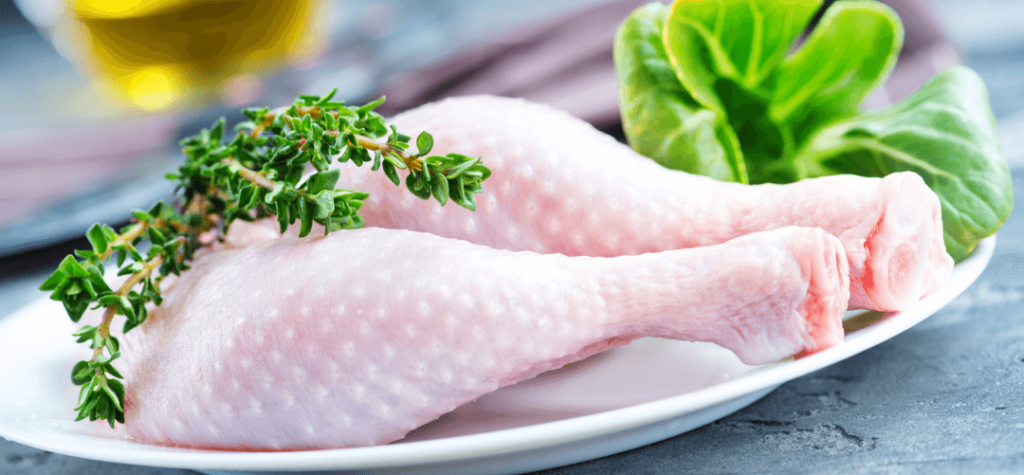
Chicken is a type of poultry that you can freeze. When you are thawing chicken, you should be cautious because the chicken may not be evenly cooked.
The best way to freeze chicken is by wrapping large pieces with aluminum foil or placing them in freezer bags. It will assist in keeping them from drying out and avoiding freezer burn.
It’s also a good idea to prevent stacking objects on top of one other since this might harm them. Another consideration is that thawing meat, poultry, or seafood should be done with caution since they may not be cooked evenly.
12. Crab
Cooked crab may be frozen. It should be frozen after being placed in a freezer-safe container. You may either thaw it out or reheat it when you’re ready to use it. It lets you simply store your crab for later use.
13. Fish
You can freeze raw fish in its original packaging without any additional ingredients. Remember that you should use caution when thawing fish because it may not be evenly cooked.
Incision below the gills using a sharp knife, then make a circular cut around each eye to remove the brain gland. Next, cut through the backbone at the tail end of the fish’s body, about an inch below where a line between its two eye sockets would be.
This makes it possible to remove the fish’s guts through its body cavity and opens the fish up for easier cleaning of any remaining viscera.
14. Hot dogs
Hot dogs are always in demand, but you may end up with too many when that large party or event comes around. Freezing them beforehand is the perfect solution to avoiding eating leftover hot dogs for weeks, and it’s not that hard to do.
How you can freeze hot dogs is very simple. First, unroll your package of hot dogs and take out many you want.
Then do the same thing with a piece of wax paper, sandwiching the hot dogs in between to avoid them sticking together when they freeze. After that, just put your super-easy “sandwiches” in a freezer bag and label them. That’s all there is to it!
15. Lobster
Lobsters can be preserved by freezing. Large specimens should have the tail split open and laid flat, while smaller ones remain whole. Smoked or cooked lobster meat is usually frozen separately, as it does not preserve raw lobster.
Raw lobsters are best stored in a brine solution for 12 hours before being frozen.
Drain away the water and replace it with fresh, cold water. Add 1 cup of salt to every 10 cups of water used. The lobster should be completely submerged.
Remove the lobster from the salt water and rinse it in cool freshwater until no more foam appears when rubbing it with your fingers. The cooling process removes much of the blood from inside the animal, which is essential in maintaining quality.
16. Lunchmeat
When freezing lunch meat, places it in the freezer immediately after purchase. If it has already been refrigerated, immediately before preparing or consuming it, remove it from its store packaging and rewrap it tightly in heavy aluminum foil, freezer paper, or plastic freezer bag.
Expiration dates are up to manufacturers, so check these dates for freshness. When frozen at 0 degrees or below, lunchmeat is best if used within 3 to 6 months.
17. Pork
Preparing pork for freezing is easy. If it’s cut into pieces, wrap it in one layer of plastic wrap. If it’s a roast, chop it into pieces to make it easier to get the right portions when you are ready to serve. The meat should be wrapped tightly enough that air cannot penetrate and dry out your pork while it is in the freezer.
Be sure the meat is wrapped securely! However, don’t use airtight packaging. If you are using heavy-duty foil, double wrap it to keep the air out.
Bacon and smoked pork chops can be frozen without any preparation. Just wrap them tightly in plastic or place them inside an airtight container before putting them in your freezer.
18. Sausage
Freeze the sausage in its original packaging. Place it in a zip-top plastic bag if you don’t plan to use the entire package at once, and squeeze out excess air before sealing.
If you won’t be able to use the sausage right away after it’s been defrosted, keep it refrigerated in its original container until you can. The beef should then be sliced into patties, browned, and any excess fat drained.
19. Scallops
Freeze scallops in a single layer on a baking sheet large enough to fit in your freezer for about an hour, uncovered. It causes them to flash freeze, making them impossible to hold together when packed.
If you plan to store them in the freezer for more than three months, consider vacuum-sealing with a food saver instead of zipper bags.
20. Shrimp
When buying shrimp, freeze them if you cannot use them immediately. This is the most practical approach to keeping large amounts fresh for a more extended period without losing their flavors and textures.
It will be ideal if you intend to store the shrimp for four days or more. If this is not your plan, just keep it in the fridge for a day. Know that freezing shrimp can end up with a more challenging and drier texture.
Though this aspect is not delicious, it would be tolerable if you would reheat them later on. Freeze shrimp by washing them first in cold water, extracting their heads, peeling off their shells, and splitting them open.
Freezing for two or three months does not alter the flavor of the shrimp. But after this time interval expires, you can expect an insipid-tasting prawn because of oxidation.
21. Turkey
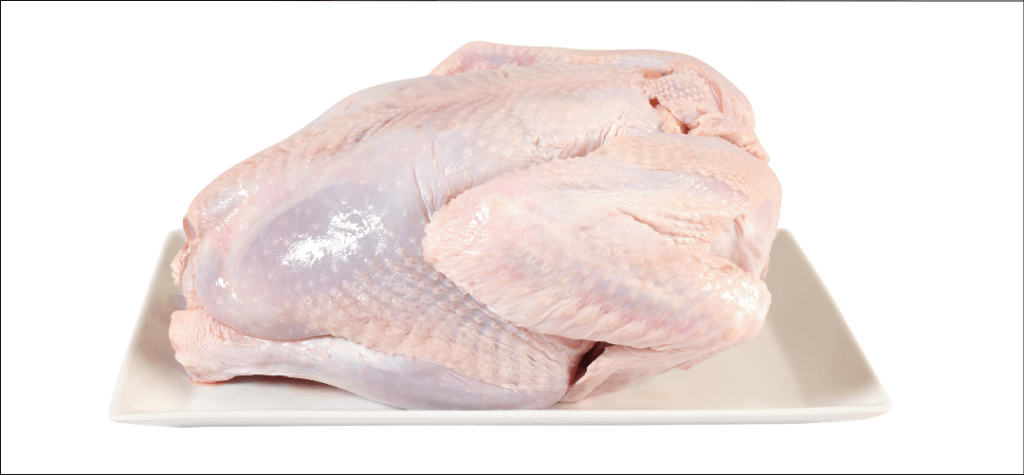
Uncooked turkeys are not generally sold pre-frozen, so you need to freeze your raw turkey yourself.
Remove the giblets from the bird’s cavity and set them aside for another use or discard. Next, place the turkey skin-side down on a large rimmed baking sheet pan and place it into the freezer.
Allow at least 24 hours to freeze solid, then turn it over onto another tray to freeze both sides. If your turkey is very fresh or you have a high-powered freezer, this might only take 12 hours.
The reason for not allowing the raw turkey to freeze in a solid block is that it can be sliced more easily after cooking, allowing the finished product to hold its shape better. In addition, once both sides are frozen, you can package your uncooked turkey according to your needs.
22. Wild game (Venison, Rabbit, Duck, Pheasant, squirrel, Goose)
Wild game is free-ranged, natural, and nutritious. It provides our bodies with essential proteins. Unfortunately, many people hunt for food or sport. Sometimes, they don’t use the meat or process it before it spoils.
So how do you keep the wild game fresh? The simplest way to preserve fresh game meats is by freezing them! Here are some specific methods on how to freeze the wild game.
1. Cut the meat into thin slices. It prevents it from drying out when you thaw it later.
2. Make sure that all blood is drained off before freezing.
3. Double seal the meat using freezer bags, wrap them with aluminum foil or plastic wrap, or place them in an airtight freezer container.
4. Label the bag with the type of meat and the date you placed it in the freezer to differentiate it from other frozen items later.
5. Store your wild game meats in a freezer at 0 degrees Fahrenheit (-18°C). It will get the freezer burned if it’s any warmer than that.
6. Freeze your meats immediately after taking them out from the field. If you wait too long, bacteria and insects may infest them before being adequately preserved.
Produce
Bacteria cannot thrive in heat since you preserve through cold temperatures (both cooking and microwaving kill off bacteria). Many people freeze their produce because the cost savings is remarkable.
23. Artichokes
Many recipes call for artichoke hearts or bottoms, and if you enjoy these recipes, you may want to preserve artichokes by freezing them. There are several simple methods for freezing artichoke hearts so that they last up to a year in your freezer without losing their quality.
The simplest method of preserving artichoke hearts is to freeze them whole. First, wash the exterior of the artichoke thoroughly with cool water and dry it with a paper towel.
Next, wrap each artichoke heart tightly in plastic wrap, and then place the wrapped hearts in an airtight freezer bag or container to prevent them from becoming freezer burned.
24. Asparagus
Asparagus is a fresh vegetable with a short growing season. It is easy to freeze asparagus, which will allow you to enjoy this healthy green any time of year. Only straight, crisp spears should be frozen. Discard ones that are limp or tough.
The next step is to blanch the asparagus. To do this, you must have a separate saucepan of boiling water ready before starting. Once the water has boiled rapidly, place the spears in for 1 minute. Then, remove them quickly with tongs or a slotted spoon and immediately run cold water over them.
The next step is to remove the spears from the boiling water and place them in an ice bath, just cold water with ice cubes. Let the asparagus stand in for about 3 or 4 minutes, then drain it again.
You can also freeze the dipped amount but blanch before dipping it in hot flavored oil or butter. Finally, pack the asparagus in your freezer containers: seal, label, and freeze.
25. Avocado (Pureed And Prepped With Lemon Juice)
Spread the avocado pulp thinly on a baking pan lined with parchment paper. After freezing, transfer to freezer bags or containers until hard. Before usage, thaw overnight in the refrigerator or for one hour at room temperature.
Because avocados discolor when exposed to air, you should add a tablespoon of lemon juice or vinegar to the puree before freezing it. It will be less likely to brown as a result of this.
Check that they’re ripe and ready to consume before you eat them. Use parchment paper or aluminum foil to cover a baking sheet with the mixture (this will make clean-up more accessible).
Transfer to freezer bags or containers after freezing and keep frozen until firm. Before freezing, thaw in the fridge overnight and add a tablespoon of lemon juice or vinegar.
As a consequence, it will have a lower chance of browning. Before freezing, mix with a tablespoon of lemon juice or white vinegar to prevent discoloration.
26. Beets
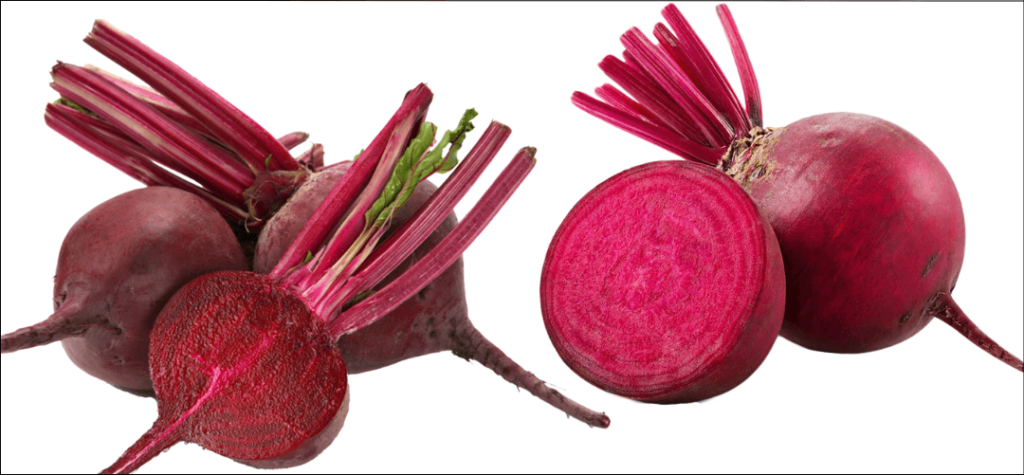
Freezing beets is such an excellent way for you to preserve all that wonderful flavor and color of these delicious roots. However, since beets are in peak season during the summer months, consider stocking up when they’re inexpensive or growing your own.
The first step is to pick through them and discard all of the beet greens since they contain oxalic acid, which may cause gastrointestinal distress if taken in significant numbers. Then, under cold running water, thoroughly rinse your raw beets.
Next, peel your raw beets. Discard the peels as you would normally do with potatoes. Slice up your peeled beets into small cubes or dice them if you prefer. You can then spread these diced or cubed pieces onto a parchment paper-lined baking sheet in a single layer.
Place the beets in your freezer until they are frozen solid, about 2 hours or so, then transfer them into airtight containers or freezer bags. You can also wrap each piece individually before placing it in the container or bag. Make sure you label and date the contents and the date you froze them.
27. Berries
Berries are great in cereal, smoothies, yogurt, and of course, straight out of hand. Berries freeze exceptionally well once adequately prepared. For most berries, you do not need to defrost them before use if they will be cooked or baked into a dish. Frozen berries are also great over ice cream!
Blackberries, Raspberries, and Blueberries
Freeze on a baking sheet for 1 hour. Remove the berries from the freezer and transfer them to an airtight container or bag. Seal it up and return it to the freezer.
These three types of berries also store very well frozen in ice cube trays! If you wish to use these berries in a smoothie, remove as many cubes as you like and thaw them overnight in the fridge.
28. Broccoli
Freezing broccoli is a great way to lock in nutrients, flavor, and color. To freeze broccoli, clean the broccoli under cold running water using your hands or a brush to remove any dirt or debris. Next, cut away any brown spots on the stems and leaves of the vegetable. Next, cut the broccoli into small, uniform pieces so they cook evenly.
Pour enough water into a big saucepan to blanch broccoli to cover the sliced pieces. Over high heat, bring the water to a full rolling boil. Broccoli should be blanched for one minute or until brilliant green.
Place blanched florets in freezer bags or containers and close securely to freeze broccoli. Store for up to eight months in the freezer.
29. Brussels sprouts
Brussels sprouts are a cool-season vegetable usually grown in the spring and fall months. They can be eaten fresh, steamed, boiled, or stir-fried and should only be harvested when they reach a length of about 1 1/2 inches.
Since Brussels sprouts remain primarily untouched for about one week after harvest, it is essential to freeze them quickly. Proper freezing of this vegetable will keep it fresh for up to four months.
Steps
1. Remove the sprouts’ brown outer leaves, cut off the root ends, and cut each node half lengthwise. Wash the projections well under cold running water until all dirt is gone.
2. Bring a big saucepan of water to a boil over high heat with approximately 1 inch of water. In a wire basket or colander, place the sprout halves and submerge them in boiling water for one minute, stirring regularly.
To halt the cooking process, remove the veggies from the boiling water and quickly plunge them into a dish of ice cubes and water. When the veggies are thawed and cooked later, they will be vivid green.
3. Remove the sprouts from the cool water, wipe them dry with paper towels, place them in a heavy-duty resealable plastic freezer bag or wrap them firmly in aluminum foil or plastic wrap to prevent freezer burn. After marking the bag with the contents and date, place it in the freezer for up to four months.
30. Carrots
The first step to freezing carrots is to decide if the carrots will be blanched and peeled before being frozen or just blanched. If you decide they should be peeled, then peel them. Then wash and cut the carrots into pieces 1/2 inch thick or smaller. Place all carrot pieces into a saucepan of boiling water and let them boil for 5 minutes.
After the carrots have been boiled, all the pieces need to be removed from the pan with a slotted spoon, drained on a towel, and then placed into a freezer bag or container. The carrots can be taken out of the freezer when needed and used in any recipe.
31. Cauliflower
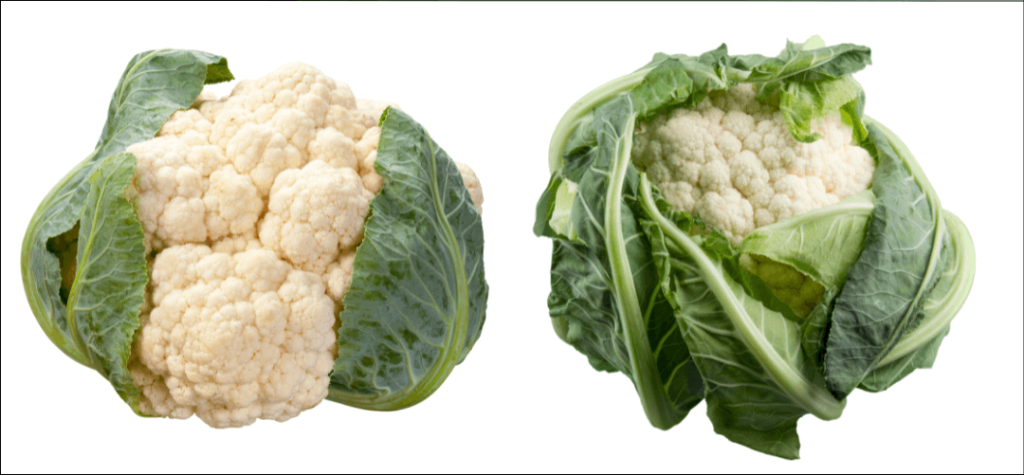
Cauliflower can be frozen quickly. Break the cauliflower into florets and blanch for 3 minutes in boiling water. Drain and place the florets in a single layer on a baking sheet. Freeze for 2 hours, or until solid.
Then, place the frozen cauliflower into a freezer bag or container. When you want to use the cauliflower, just let it thaw in the refrigerator.
Typically, you can keep cauliflower for 6 to 8 months in the freezer. But if it is not supported at 0 degrees F or lower, it will lose some of its flavor and texture after only 3 to 4 months. Also, be sure to label your packages with the date so you don’t have any surprises when using the cauliflower.
32. Cherries
It is best to start with fresh, ripe fruit. If using cherries for cooked dishes, buy extra – they are so good you may be tempted to eat them raw!
Cherries can be frozen both with and without sugar, but you should not add the sugar until after they are thawed. Although using sweetened cherries in recipes is a simple method to get a head start on your cooking, this maintains the taste of the fruit better.
33. Greens (Including Spinach And Collards)
Greens are among the most accessible produce to preserve by freezing. All you need is freezer bags and some freezer space at 0° F or colder (the standard home freezer compartment is around zero). You can also place packs in a stream of cool air coming from the freezer, where they’ll quickly drop to 0° F.
Greens freeze well, including collards, kale, mustard greens, and Swiss chard. To lengthen the shelf life, add some salt or vinegar. Before blanching the greens, remove any ribs or short stems (see below). Gardens that have been blanched will change color from vibrant green to olive drab.
Greens That Freeze
1. Separate each leaf into smaller pieces by thickly slicing the ribs, stems, or midribs. You may alternatively cut entire leaves into bite-sized pieces for a chopped salad.
2. Blanching Greens: Fill a big pot halfway with water and place a wire basket in the bottom. Fill the saucepan halfway with cut-up Greens, then whisk them in loosely. Push them down into the boiling liquid as soon as they wilt and float on top of the water—cover and cook for 2 minutes.
3. Drain well using a wire strainer or colander. To halt the cooking, rinse in cool water
4. Immediately pack cut-up whole leaves without stems into containers with a capacity of at least 1 pint. If you’re packaging entire leaves, dampen them before closing the container to prevent them from adhering together.
5. Press out the air and make a good seal. 6. Pack into containers that hold at least 1 pint of chopped Greens, with 1/2 inch headroom to allow expansion while freezing.
Label and date containers, then freeze at 0°F or colder for up to 10 months. According to North Carolina State University study, mixing chopped Greens with whole leaves in the same container prevents freezer burn.
6. Pack them tightly with as little air as possible before closing and labeling containers. For modest quantities, you may also use bags. Close and label bags after pressing out as much air as possible.
7. To prepare greens for blanching, remove the thick ribs and midribs from each leaf before freezing them. Gardens may be frozen without blanching, although it can increase their storage life by a few months.
8. Pour one teaspoon of vinegar per quart of greens into a big saucepan of water. Bring to a boil, then add the cut-up Greens in batches to keep the water boiling—Cook for 30 seconds for chopped greens or 2 minutes for entire leaves until wilted and brilliant green. For every 4 cups of cooked Greens, add one tablespoon of salt. To end the cooking, drain carefully and rinse with cold water.
9. Pack into containers or bags and freeze immediately at 0°F or colder. If you prefer, pack into rigid containers, leaving 1/2 inch of headspace to allow for expansion during freezing. You can also plug into bags, then roll and tie the tops.
10. Blanched Greens will keep in the freezer for 4 to 6 months; unblanched greens should be used within two months of freezing.
34. Mangos
Mango is a delicious tropical fruit, but its season is so short! So the next time you come across one of these sweet treats, instead of devouring it right away, why not take the time to preserve them for later?
There are several ways to keep mangoes fresh for an extended period. Read on to learn how to freeze mangoes the healthy way.
Mango health benefits
Mangoes are an excellent source of vitamins A, C, and D. 100 grams of raw mango contains around 130% of your daily vitamin A requirement, 45% of your vitamin C need, and 6% of your daily value for vitamin D.
These three essential nutrients work synergistically to promote good eyesight, boost the immune system, and increase bone density. In addition, mangoes are also rich in anthocyanins which help prevent heart disease and cancer by protecting cells from oxidative damage.
How to freeze mangoes
Mango Freezing Method: Freeze whole mangos with skin on
Purchase ripe yet firm mangos at your grocer’s. Wash the whole fruit in cool water, scrubbing gently with a vegetable brush to remove any dirt or pesticide residue. Pat dry with a clean dishtowel.
Peel the mangos by cutting down between the skin and flesh of each side of the pit. Cut into cubes or slices approximately 1/2-inch thick. Arrange the cubes or pieces on a baking sheet lined with parchment paper.
Insert toothpicks into each mango cube and place in the freezer until firm, about 2 hours. Remove toothpicks and seal cubes or slices in freezer-safe plastic bags or containers. Seal tightly to prevent air from entering, label, and return to the freezer.
35. Melon (chunks)
Freezing melon (chunks) is a great way to enjoy the fruit long after the growing season has ended. The first step in freezing melon chunks is to chop them into 1-inch consistent cubes.
Then, to avoid freezer burn, store them in a zip-lock bag and cover them with lemon juice (or another fruit juice). They may now be frozen for up to 6 months at 0 degrees Fahrenheit or below.
36. Mushrooms
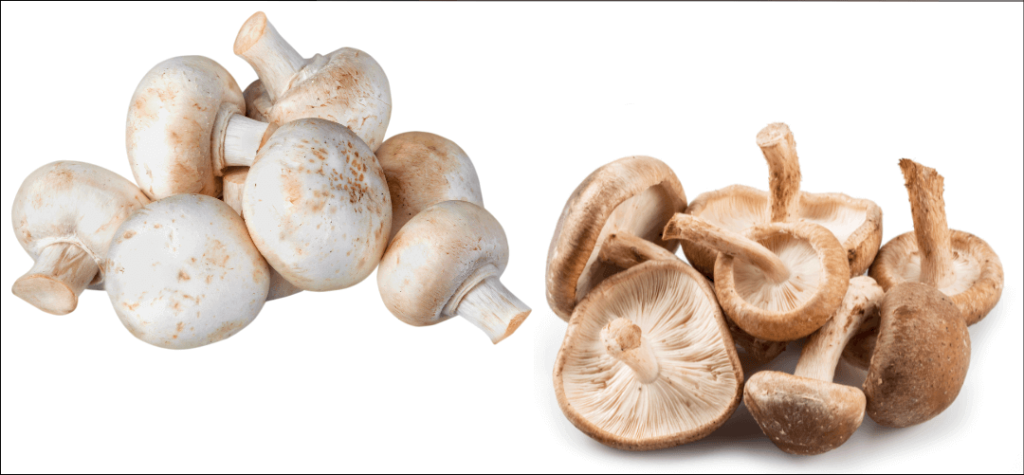
Mushrooms that are about to go wrong can be saved by freezing them. However, they must be adequately prepared before being frozen, or you will end up with mushy, unappetizing mushrooms when you defrost them.
Here’s what you need to do:
First, cook the mushrooms either in a skillet on the stove or microwave.
It will soak up any excess water that might end up making your mushrooms soggy when you freeze them.
Put your mushrooms in a freezer bag and squeeze out as much air as possible before sealing the bag. This will prevent freezer burn, which will make your mushrooms tasteless than fresh when you defrost them.
Label and date your bag before freezing so that it’s easy to tell what kind of mushrooms they are later.
37. Okra
Freezing is a widely used food-preservation method. For example, to freeze okra, blanch it in boiling water for about 2 to 3 minutes. Then place it in airtight freezer bags or containers and freeze at 0 degrees Fahrenheit (-17 degrees Celsius).
1. Wash the okra in cold water using a vegetable scrub brush. Trim off the stem end without cutting into the pod with a knife.
2. Fill a large saucepan with at least 1 gallon of water and bring it to a rolling boil over high heat in an 8-quart or bigger pot.
3. Place the okra pods into the boiling water and blanch them for 2 to 3 minutes.
4. Remove the okra from the boiling water with tongs or a slotted spoon, then place it in ice-cold water immediately to stop the cooking process.
5. Drain well before packing.
6. Place the okra in airtight freezer bags or containers.
7. Freeze at 0 degrees Fahrenheit (-17 degrees Celsius). With this method, it should keep for about six to nine months. Defrost before cooking. Blanching is necessary to destroy microorganisms and enzymes that may cause food spoilage.
38. Onions
Onions are a great vegetable to have on hand. Not only do they taste great, but they’re also incredibly healthy for you! Onions can be used in both sweet and savory dishes.
They go great with potatoes, pasta, rice, meats, and soups. Onions also provide many health benefits, such as improving cardiovascular function and blood pressure.
There are many ways to preserve onions to keep them fresh for future use. One way is by freezing onions. You can freeze whole, cut, or chop onions. Follow the steps below once you’ve decided what form of onion you’d like to freeze (whole, sliced, or chopped)!
STEP #1: Prepare the onions
Peel and cut up your desired amount of onions into small enough pieces to fit in a blender. Keep in mind that smaller pieces will help your blender more effectively puree.
Next, add a bit of water to the blender, about an inch or so, depending on how much onion you have. The water is used for the onions to fall into the blender’s blades instead of jumping out.
STEP #2: Pulse and blend
Pulse and blend your onion, adding more water if need be. Continue pulsing and blending until you have a smooth puree. When done, the puree should look somewhat like applesauce, so add a bit more water if it does not look like applesauce.
STEP #3: Pour the puree
Pour the pureed onion into a baking dish or tray so that you can freeze your puree in individual portions. It should be about an inch deep so as not to break apart when you bend them over. You can add a bit of water on top to help freeze it faster. Put this dish into the freezer and freeze until solid (at least 3 hours).
STEP #4: Remove from the tray
Once your puree is frozen solid, you can remove it from the baking dish and place it in a freezer-safe bag/container. Be sure to label the bag to indicate what and when you made it. It should stay fresh in the freezer for about 3-6 months, depending on how good of a conditioner your freezer is.
STEP #5: Use your onions
When you’re ready to use your frozen onion, remove the quantity you want from the freezer bag and consume it within three days after thawing. Make sure frozen onions are kept in the coldest region of your freezer; otherwise, they may go bad quicker.
39. Peaches (Peeled, Sliced)
Peaches are sweet and delicious. They are so good that they should be enjoyed year-round. Beauties can be purchased year-round, but it is usually more expensive to buy them out of season than freeze them for later use.
Fresh fruit is often pricey. If you have a big family or serve peach slices often, you’ll save money by purchasing peaches when they’re on sale and then freezing them for later use. All you need to do is peel and slice your peaches and then place them in a plastic bag (or another type of seal-able container).
Make sure not to leave any gaps between the peach slices. Instead, pack the peaches in as tightly as possible to avoid air pockets between them. Putting the peach slices in a plastic bag or similarly sealable container will prevent your fruit from drying out or being freezer-burned.
Freeze the peaches overnight or for many hours. If you’re in a rush, you may put them straight into the freezer without first freezing them. However, be careful to eat them within two weeks after defrosting them, as they will deteriorate more rapidly.
Let them thaw at room temperature when it’s time to enjoy your frozen fruit. Of course, you can also eat the fruit frozen if you prefer. No matter how you choose to use your peaches, they are sure to be delicious!
40. Peas
If you’ve got a bunch of peas from your garden or the farmer’s market and don’t know what to do with them, consider freezing. Frozen peas maintain most of their nutritional content and may be used in various recipes for fresh peas, such as soups and other meals. It’s a simple procedure that takes just a few minutes to finish.
Bring them inside and put them out in a single sheet on some paper or towels to dry if you just gathered them from your garden. You may keep them in the fridge for up to two days while preparing them for freezing.
If you bought them at the farmer’s market, place them in plastic bags once they arrive home so that they retain any moisture they may have picked up while being transported.
Prepare the peas to be frozen by shelling them from their pods if they are in the pod and removing any strings that may be present. Peas in the pod can also be frozen but require a bit more work, time, and effort and should only be done if planning to use for unique recipes where appearance is not as much of a concern as taste.
Place the shelled peas in freezer bags or containers and place those in the freezer. If using bags, squeeze out as much air as possible to prevent freezer burn during storage. Adding a few ice cubes to each bag before sealing will also help keep them fresh for more extended periods.
41. Pineapple (Chunks)

You can freeze pineapple, but it will lose some sweetness and texture. To prepare the pineapple, wash the skin under cool water.
Then, remove the pineapple’s leaves and base using a sharp knife or kitchen shears (the bottom where the fruit was attached to a stem).
Remove a thin slice of pineapple from around the central core. Remove the body and discard it. Using a paring knife, cut the fruit into cubes or spears.
Enjoy your fresh, frozen pineapple for up to 6 months in the freezer. If you plan to use it in a smoothie, put it in plastic bags and squeeze out any excess air before putting it into your freezer.
Frozen pineapple can also be used in baked goods. For example, it is good in bread and muffins. Thaw the fruit by either letting it sit for about an hour or microwaving it on a plate for 30 to 60 seconds, but make sure not to let the fruit get hot.
42. Potatoes
You can either freeze potatoes or cube them into a freezer bag to use later.
1. Potatoes are best stored in a cool area, such as the refrigerator. To store them for longer than two weeks, they should be frozen.
Freezing potatoes prevents them from becoming spoiled. Once you have cut up your raw potatoes, wash the pieces off to remove any excess dirt or pesticides that may still be present.
2. Chop the potatoes into smaller pieces before putting them in a bag. Smaller pieces will freeze faster, which keeps them fresher once defrosted. If desired, you can also boil the potatoes for 2-3 minutes before putting them in a bag. Then, keep them in their skins and put them directly into the freezer.
3. If you only want to use the potatoes once, consider cubing them instead of keeping them whole. Cubing will allow you to use half of the potato at a time and keep the other half preserved in your freezer. To freeze potatoes whole, just poke a few holes in the bag and place them into the freezer.
4. Potatoes can be kept frozen for up to one year.
5. Be sure to write down how you stored them and when they were put into storage so that you can recall if they are still good after a year.
6. To use, defrost the potatoes at room temperature or in the fridge. You can also place them in boiling water for five minutes before using them to make them hotter and ready to eat sooner.
7. Frozen potatoes may be used in a variety of ways:
- Hash browns can be formed after frying.
- Scalloped or au gratin potatoes are great when baked in the oven
- Potatoes can also be mashed when frozen and defrosted
8. When you are ready to use your frozen potatoes, drain out any liquid from them while defrosting.
9. Be sure to store your potatoes properly to keep them fresh and, most importantly, safe to eat.
10. While you can freeze cooked mashed potatoes, they lose most of their flavor when thawed out again. If you want to freeze mashed potatoes for later use, be sure to add additional seasonings and cream cheese when you mash them.
11. If your potatoes turn green after being frozen, this means that they were exposed to too much light and oxygen before you put them into storage. Green potatoes should be thrown away as eating them could cause food poisoning.
12. You can freeze any type of potato; however, red and yellow potatoes do not freeze well and only be used when fresh.
13. If you are in a rush to freeze your potatoes, simply place them in the freezer while they are still wet from being washed. The optimal storage time is two weeks in the refrigerator or one year in the freezer if kept tightly wrapped.
43. Pumpkin
Pumpkins are a very healthy and nutritious vegetable. It is a good source of antioxidants, beta-carotene, potassium, niacin, and vitamin C. Pumpkins can be used in various recipes, including soups, stews, desserts, and salads.
Cut the pumpkin into small chunks and remove all of the seeds, and then you can use a spoon or ice-cream scoop to get the flesh out of the shell to cut it even smaller if needed. Then when they are ready, put them in ziplock bags or any freezer-safe bags.
Make sure you squeeze all of the air out of the bag before sealing them. Then, please put them in the freezer for storage now that they are prepped. You can also blanch your pumpkin chunks if you prefer your pumpkins to be crunchier instead of soft.
44. Squash (Summer Squash, Zucchini, And All Winter Squashes)
Squash can be frozen raw or cooked. Most people prefer to cook their squash before freezing, but the process is the same whether you freeze cooked or raw. The steps below outline how to blanch and prepare squash for freezing:
Steps in Detail:
1. Choose fresh squash. Strip off the skin and cut into slices, rounds, or sticks.
2. Blanch (scald in boiling water) for three to four minutes, depending on the thickness of the pieces.
3. Immediately cool by plunging into cold water until cold enough to handle; drain well. Drain again before packing for storage; package airtight with no headspace.
4. The USDA recommends boiling or cooking in a pressure cooker for five minutes before freezing to reduce the risk of Clostridium botulinum spoilage.
5. Label and date packages.
6. Store at 0 F or lower in the coldest part of the freezer compartment.
It’s better to blanch squash before freezing it, then pack it into freezer bags or containers. If you prefer, you could wash the squash well, cut it up and freeze it without blanching first; however, the quality is likely to be significantly lower than if you take the time to Blanche your squash before freezing.
Summer Squash (in all varieties including yellow, crookneck, and straight neck), Zucchini (including baby zucchini), and all Winter Squashes (Hubbard, Buttercup, Spaghetti, Acorn)
Step 1: Choose fresh squash. Strip off the skin and cut into slices, rounds, or sticks, depending on your preference.
Step 2: Blanch in boiling water for 3-4 minutes, depending on the thickness. If you are blanching your squash for immediate use, you can skip step 2 and go straight to step 3 below.
Step 3: Plunge into cold water until cold enough to handle; drain well. Drain again before packing for storage; package airtight with no headspace.
Step 4: If you prefer, you could opt to boil or pressure cook your squash for 5 minutes before freezing to reduce the risk of Clostridium botulinum spoilage.
Step 5: Label and date packages.
Step 6: Store in the freezer compartment at 0 F or lower.
45. Strawberries (Hulled)
Strawberries can be frozen to use as needed during the off-season. Hulled Strawberries last up to one year in a freezer.
Steps:
1. Prepare strawberries by washing and cutting off stems and unripe bits.
2. Place prepared strawberries into a single layer on a cookie sheet lined with parchment paper.
3. Place prepared strawberries into the freezer on the cookie sheet for about 4 hours or until frozen solid.
4. Remove strawberries from the freezer and place them in a Ziploc bag with as much air removed as possible.
5. Return to freezer until useable.
6. Enjoy your frozen strawberries by using them in smoothies, baked goods, etc.
46. Sweet Potatoes
When you want sweet potatoes but don’t want to spend a fortune for them at the grocery store, frozen sweet potatoes are a terrific option. The most excellent part about freezing your own is that they taste so much better than store-bought ones!
To freeze:
Peel and dice the sweet potatoes. Add water to a large pot (enough to cover the sweet potatoes) and bring to a boil. Boil for 5 minutes, add the diced potato, and cook until tender but not mushy.

Drain into a colander or strainer and allow them to cool for about 15 minutes. Throw the sweet potatoes on cookie sheets in a single layer and place them in the freezer.
Allow to freeze for about 30 minutes, and then transfer them to ziplock bags or other airtight containers (this will help protect them from freezer burn). Thaw overnight in your refrigerator when you are ready to use them. Add the desired amount of thawed sweet potatoes to a large pot with enough water to cover them.
Produce That You Can Freeze (But Only In Certain Circumstances)
There are certain fruits and vegetables that you can freeze, but not everyone should do it. There are only a few produce items that work well for freezing. The best options for freezing fruit are lemons, limes, frozen blueberries, frozen strawberries, cranberries, and raspberries.
What Fruits Should Not Be Frozen?
Foods high in water content will often turn mushy or lose their flavor when thawed, so you should always avoid freezing bananas, grapes, citrus fruits (oranges, grapefruit), and pineapples. Another fruit that doesn’t freeze well is melon (cantaloupe, honeydew), as it tends to get a bit mushy when thawed.
For freezing, the best vegetables are peas, green beans, mixed veggies, corn, broccoli, carrots, and spinach. As with fruit, you should avoid freezing foods with high water content, such as lettuce, celery, cucumbers, radishes, tomatoes, peppers (including bell peppers and hot peppers), garlic, etc., mushrooms, eggplant, onions, summer squash, Zucchini.
47. Cabbage (Will Be Soggy, Can Be Used In Cooked Dishes After Frozen)
The freezer time for this type of food is not as important as the size and type of package. Choose a package that protects against moisture and air (foil or plastic bags or glass containers). Make sure to use a permanent marker to note the contents and date.
Cabbage is a highly nutritious and versatile vegetable that can be stored long-term, but when it is frozen, it takes on a soggy texture and has lost most of its flavor by the end of the cooking process.
The best way to freeze cabbage is to shred it (if you do this before freezing, blanch for 2 minutes in boiling water), cool, place it inside an airtight freezer bag or container and return it to the freezer.
It will take on a slightly mushy texture once thawed but retains most of its flavors and nutrients and can often replace common ingredients such as potatoes in cooked dishes after being frozen.
One great use for cabbage post-freezing is coleslaw which must always include chopped raw cabbage before adding other elements.
The addition of thawed cabbage will still give you a crunchy coleslaw (using cooked cabbage means it will be wilted). When freezing such large amounts of cabbage, it is best to separate it into smaller portions before placing it inside the freezer, making defrosting far easier.
If unsure what storage method to use, place it in a sealed plastic bag and place it inside another bag before putting it in the freezer, as airtight bags are easy and cheap to acquire and can be reused several times.
You should avoid storing cooked cabbage for more than three months unless you freeze it at -2°C or below, as after this time, bacterial growth may occur, which can cause food poisoning if not frozen quickly enough.
Freezing cabbage is a great way to store the leftover excess from large family meals or avoid wastage, but it should be used in cooking rather than being eaten on its own once thawed.
Cabbage will lose around 60% of its vitamin C content when frozen but retains most of the other vital nutrients, and because fresh cabbage can sometimes be unavailable, this method does work well up to a point.
48. Celery (Only To Be Used In Cooked Dishes)
Celery is a low-calorie, low-carbohydrate vegetable that can be easily added to any dish for an extra crunch. This vegetable is used in many soups and casseroles because of its flavor. Wash celery well and cut it into pieces as desired—Blanch celery before freezing.
Steam celery stalks until they are half-cooked, about three minutes. Stuff the cooled celeries into freezer-safe bags or containers, seal and label with date and contents before freezing. The blanched celeries will keep one week in the refrigerator.
To use celery, remove it from the freezer and thaw it completely—Cook as desired (microwave or boil until tender). Then, add celery to cooked dishes like soups, stews, casseroles, rice pilafs, et cetera. Celeries that are not blanched before freezing will darken when frozen; therefore, they should only be used for cooking.
Blanching helps maintain a colorful crispness and flavor of vegetables during storage. Therefore, it is generally carried out with most frozen fresh vegetables for later consumption since color and taste can deteriorate without it.
49. Garlic (Frozen In Oil)
Garlic is easy to freeze, and when frozen in oil, it makes it super convenient to thaw out just the right amount needed.
When thawed, it is soft but not mushy.
Melt 2-3 tablespoons of olive oil in a saucepan. Crush garlic cloves or slice into thin pieces and add to the oil. Simmer for 5 minutes on low heat to infuse the flavor of garlic into the oil.
The garlic will keep for up to 3 months in the freezer. To use from frozen, simply add as much as needed to your dish and allow it to thaw out while you continue preparing the rest of your meal.
50. Herbs (Frozen In Water Or Oil To Be Used In Cooked Dishes Or Dressings)
Packing the herbs into an ice cube tray with water or oil is easy to store. It enables you to have them readily available, so you do not have to go through the hassle of thawing them before using them in recipes.
The good thing is that you may just have to use a small cube of the frozen herb for your stews, salads, soups, and pasta dishes. Herbs are costly, especially if bought fresh from the supermarket or farmers’ market at their peak season.
It often results in wastage – either because they spoil before they are used up or because you have to use a lot of the fresh stuff to get a subtle flavor from them.
For Water: Use clean water, and make sure no dirt remains on the leaves before freezing. Then put them in ice cube trays – about one teaspoon of chopped Herb per cube is sufficient (you can use more if you like a more robust flavor). Leave some space at the top of each container for expansion.
For Oil: Use clean oil, and make sure no dirt remains on the leaves before freezing. Then put them in ice cube trays – about one teaspoon of chopped Herb per cube is sufficient (you can use more if you like a more robust flavor). Leave some space at the top of each container for expansion.
What Not to Do: You should never blanch or boil the herbs before freezing them. It is unnecessary, and the water-soluble nutrients will be lost during this process.
Once you have frozen your Herbs, it’s time to use them.
Take the number of cubes you require for your recipe, and either run them under warm water until they thaw or put them in a small bowl and microwave for about 30 seconds to one minute until melted. Remember to drain off any excess liquid before adding them to your dish when thawed.
51. Overripe Bananas, Peeled (Great For Smoothies And Banana Bread)
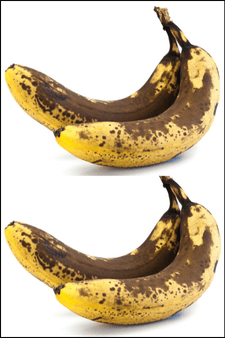
Bananas are cheap and a great source of potassium and fiber! One day though, they will be overripe, and that’s when you should freeze them!
If you want to freeze the bananas for smoothies, slice them up and put them in a Ziploc baggie so they are easier to break apart for your blender.
If you want to freeze the bananas whole, pop them out of their peels when they are frozen and store them in another freezer-safe container or gallon-freezer bag.
To use frozen bananas, defrost them and put them into a blender or food processor with your choice of beverage. Milk works well. Blend until smooth! Great for breakfast smoothies, dessert drinks, or even healthy ice cream.
Products That Can Be Frozen In Syrup Packs
52. Apples
Did you know that you can freeze apples? Some people are not aware that this is possible, but it is. Apples can be frozen in different ways depending on whether they will be used for cooking, eating fresh, or drying.
Freezing apples allows you to keep them longer and use them when needed without worrying about finding a place to store them.
Here are the different methods of freezing apples:
- Freezing peeled, cored, and cut apple slices or rings for cooking purposes
- Blanching the whole fruit before storing to keep it from turning brown when thawed
When you use your frozen apples for baking, make sure they are completely thawed out first. You can also use them for pies, crisps, and muffins.
Cooked vegetables should cool down before putting them in the freezer. Please don’t allow them to sit at room temperature or keep reheating them because this may alter the taste of your apple slices after they have been thawed.
You can also freeze apples whole, unpeeled, and uncored to use for cooking or baking later. However, it would help if you blanched your whole apples first before you freeze them because this will prevent the fruit from discoloring after it has been thawed.
53. Citrus fruits
Citrus fruits are available year-round. However, they’re best when they’re in season and cheap. Unfortunately, citrus fruits also tend to be expensive when they’re out of season, but you can freeze them so that you always have some on hand.
Freezing citrus fruit is easy if you know what you’re doing.
- Peel and slice it into pieces. The size of the details you cut depends on how much of that fruit you want to use at a time. For example, you’d like to make sure there were no seeds in the pieces you cut for orange juice. However, if you’re using the fruit for garnishing, then those wouldn’t be a problem at all. Seeds can also be removed from the slices as well.
- Put your citrus fruit into individual freezer bags or containers and label it with what it is and when you freeze it.
- If you have more than one bag of fruit, make sure to label them with the date you froze it.
- Make sure to leave some space in your freezer bags because frozen food expands. You can also wrap the individual pieces in aluminum foil or plastic wrap before freezing them for an even better way to keep out air and moisture.
- It’s now ready to use!
- If you want to defrost your fruit, separate the individual pieces and let them sit at room temperature for a few hours. It’s now ready to use!
The shelf life of frozen citrus fruit is quite long if done correctly. Citrus fruits can be frozen for up to six months if the fruit is not peeled first. After that, you’ll need to repackage your fruit and freeze it again. Citrus can be stored for two years if it’s unpeeled before freezing!
54. Grapes
Grapes are often associated with summertime snacking, thanks to their refreshing sweetness. Plus, they’re high in nutrients and usually pretty cheap at the supermarket. But what happens if there are leftovers after a casual day of wine-and-cheese tasting? The answer is easy: you can put them in the freezer.
Freezing for too long will cause the grapes to lose their flavor and color. To avoid this, you should only freeze grapes for up to six months at a time.
- You can use pink or green grapes.
- Preferably, use one pound of grapes at a time.
Remove the grapes’ stems. Make sure you squeeze out all of the air before packing the bag or container shut.
Keep your frozen grapes in their original packaging or another freezer-safe bag. Label the sealed container with its contents and date. You should eat your grapes within six months of freezing them.
Frozen grapes are great for snacking, but they’re also suitable for adding salads, fresh fruit platters, or yogurt parfaits. You can also use frozen grapes as an ice-cold treat on a hot day.
You can freeze other types of fruit in the same way, but make sure to skip any fruits with low acidity. These include bananas, avocados, and mangos (when they’re fully ripe). Also, avoid freezing-cut fruit or berries.
Many people freeze grapes in their original packaging, but this is not the best way to store them. Ziploc bags are much airtight than cardboard boxes, preventing your fruit from drying out. Also, take the time to squeeze out all of the air before sealing your bag or container shut.
55. Plums
Plums are deliciously eaten fresh, but they can also be used in many different baked dishes. But what about the plums you do not use for cooked dishes? Can these also be frozen, or should they be thrown out?
It is possible to freeze unripe green plums, but turning them into jam or marmalade is preferable because the result will be better. First, wash them and remove the stones (pits) to freeze plums.
Next, cut the plums into smaller pieces and put those in a bowl. Add two tablespoons of sugar to every cup of fruit and mix well until all plums are coated with sugar. Allow this to rest for at least one hour.
The plums can then be put into containers and frozen for six months. Note that the fruit will become slightly mushy after thawing but can still be used in baked dishes. You can also choose not to remove the skin before freezing if you want to use the fruit only in cooked dishes directly in the container.
Keep in mind that freezing fruit is not the same as canning or preserving, which usually has to go through a time-consuming process. The plums are frozen for a short period so they do not become mushy and lose flavor.
56. Pomegranates
Pomegranates are an excellent source of antioxidants, but too much can be bad for your teeth. On the other hand, when you eat the whole fruit, it has a lot of fiber which causes you to eat less.
Therefore, it makes it an adequate weight-loss food when eaten in moderation. Either way, what happens when there are pomegranates left over?
Steps for Freezing Pomegranates:

- Put the pomegranate juice in a bowl and use a fine sieve or strainer to separate the juice from the seeds and membrane. This is because it’s easier to separate once they’re frozen and thawed again.
- Pour the juice into ice cube trays and freeze them until stiff instead of overnight, leaving them in the freezer. Please leave at least one inch between each cube so that they don’t get stuck to each other when you take them out for use. Depending on your freezer’s temperature setting, this may take a few hours.
- Once hard, please take out the cubes and put them in a freezer bag.
- Take out as needed in smoothies or other recipes that call for pomegranate juice, seeds, or even whole fruit. They should keep well in the freezer for up to two months before you have to use them all.
You can enjoy pomegranates all year by freezing them with this simple method. Be sure to separate the seeds from the membrane, put them in ice cube trays, and leave them in your freezer until they are hard before putting them in a freezer bag for storage.
Then, when you want one, simply take it out of the freezer and use it as you would fresh pomegranate.
Nuts, Seeds, And Grains
57. Nuts (Also Nut Flours Are Plentiful In The Freezer)
Nuts and seeds are significant. We all know that. To reduce the risk of rancidity and save money, you could buy them in bulk. But because we don’t eat a ton of nuts every day (bad for your health) or can finish up a big bag in no time, so freeze them after opening the packet using the ‘dry ice’ method.
Peanuts and cashews, for example, contain a lot of oil, so it is even more critical than most other nuts to store them in the fridge or freezer and keep their high quality as long as possible.
Nuts are fats inside, and they go rancid with time if not stored properly. Rancid nuts and seeds release free radicals into your body that will attack healthy cells and causes damage to the DNA (cells’ genetic material).
If you have ever tasted rancid nuts or seeds, it is easy to see that they taste bad. However, even though you might not recognize the unpleasant taste, you can be sure they are rancid and cause free radical damage to your body cells.
58. Seeds
Seeds are small life packets containing the genetic material necessary for growth into mature plants. Therefore, when you buy seed-starting supplies or save seeds from your garden, it is essential to store them to last longer appropriately.
Seeds stored improperly may not germinate when you plant them because they have been exposed to temperature fluctuations, humidity, and light. On the other hand, adequately stored seeds can last several years before expiring.
Don’t let your saved seeds sit around in an envelope or jar after you collect them! You must take proper care immediately after harvest if you want to maximize their storage potential.
Harvested seeds should be processed within two days of collection to ensure maximum viability. Make sure to harvest seeds from healthy plants and store them in a fantastic, dark location.
Use clean containers, such as vials or envelopes, for packaging the seeds for storage. Write the date and variety of grain on each container and include a few seeds if you need to test viability later. Store the containers at room temperature away from direct sunlight until you are ready to begin the germination process.
The first step is to mix one part sugar with nine parts water and place it in a freezer-safe bowl or jar. Next, empty all of your saved seed packets into this mixture so they are submerged under the liquid. Finally, make sure that you label the outside of the container to know what seeds are inside.
59. Flours (High In Oil Content Like Wheat Flour)
Wheat Flour can be frozen to maintain freshness for up to 3 months or longer if stored properly. Here’s how:
1. Seal the desired amount of Flour into a plastic freezer bag that is labeled and dated. Then mark and date an outer more giant heavy-duty freezer bag along with the list of ingredients inside.
2. Place in a dark, dry place at 0°F or lower for up to 3 months, if desired.
3. For best results, use within three months. And remember No need to thaw and refreeze if you’re going to use it immediately after removing it from the freezer; mix as usual. Or go here for more detailed information about how long you can store different types of Flour in your freezer at 0°F or lower.
4. Thaw at room temperature. Or, if you are in a hurry for some reason, thaw your Flour in the refrigerator overnight instead of on the kitchen counter at room temperature.
5. For more details about freezing Flour high in oil content like wheat flour, go here.
6. To see more information about how long Flour high in oil content like wheat flour can last in the freezer, go here.
7. For even more details about different Flour and thawing methods, go here.
8. And for additional information about how to prepare Flour high in oil content like wheat flour for your freezer, go here.
9. For more information about what types of Flour to freeze, go here.
10. For even more details about freezing common ingredients like Flour high in oil content like wheat flour.
Baked Goods
Whether it’s a pack of Chips Ahoy or Oreos, these can be frozen and will maintain their freshness. However, there are some rules to follow to freeze these snacks successfully.
First of all, it’s essential to know that the below-freezing temperature causes a chemical change in the ingredients of baked goods.
If you put them in the freezer at this temperature or lower, the water in the product crystallizes, forming ice crystals. When this happens, this causes ingredients to expand and become porous. It means that if you try to eat these items straight from the freezer, they can feel dry and brittle in your mouth.
60. Biscuits
There are some reasons why one may wish to freeze biscuits. These include: Downtime in the production schedule, simple preference for baking fresh, or you don’t want (or need) to go through the whole baking process again if time is an issue.
First things first, let’s discuss storage containers. The best containers to store your biscuits in are, of course, airtight. For the most part, this eliminates plastic, so I recommend using glass storage containers with a rubber or silicone seal. If you don’t have any of those, put them in a Ziploc-type bag to avoid any moisture.
For the tricky part, how long can they be frozen, you might ask? It varies per recipe, but most recipes are good to go up to 6-9 months (though I’ve had some last one year and were still perfect!). I wouldn’t advise going more prolonged than that as the taste and texture will suffer.
61. Brownies

You can freeze them later if you have any extra brownies leftover after a party or family gathering. When freezing your Brownies, make sure that they are in the freezer before the chocolate has had time to harden completely.
If this happens, it will be tough to serve them later. You can use any freezer-safe container or Ziploc bag to store them in the freezer. If you are using a plastic bag, make sure to get out as much air before sealing it to last longer.
If you want to save them for more than two weeks, it is best to double wrap them with either aluminum foil or plastic wrap and put them into the Ziploc bag. It would help if you were also sure to label your container with the date you made the Brownies so you know how long they have been there.
Remove them from the freezer about one hour before serving when you are ready to help. It will give them time to thaw out, but it will not be long enough that they become soggy or lose their shape.
When you are ready to serve them, cut the brownies into squares and use a clean pan for baking. Make sure that you grease the bottom of your pan first. Next, preheat your oven before placing your Brownie pieces onto the sheet. Bake as directed and enjoy your Brownies!
62. Cakes (Unfrosted)
Cakes, muffins, and cupcakes can be frozen before or after baking. Freezing is a great way to save time and money! There are many benefits of freezing cakes:
- First, cakes taste fresher when thawed than the day they were made.
- You avoid overworking your mixing arm on multiple batches of cakes by making them all at once.
- Finally, you can make a large number of cupcakes to keep as backup for those last-minute birthday parties!
The following steps will give you great success with freezing your cakes:
- Prepare your unfrosted cake as usual.
- Line the bottom of your cake pan with wax paper/parchment paper.
- Place the cake in the prepared pan, and cover it tightly with aluminum foil.
- Freeze your cakes until they feel solid (this usually takes about a day).
- Once frozen, remove them from their baking pans.
- Wrap tightly with plastic wrap and place in freezer bags.
- Place cake in the refrigerator to thump before frosting and decorating.
- Make sure you label your cakes with their flavor, ingredients, bake time and decorations!
- French vanilla cupcakes freeze exceptionally well – they remain soft when thumped, even after freezing for six months or more!
- Make sure you thump your cake before frosting and decorating it – this makes a huge difference! If there is any moisture, the frosting will melt.
- Do not bake cupcakes or cakes directly in ice cream containers or muffin tins – they may crack when you remove them after freezing!
Muffins and cupcakes can be stored in the freezer after baking, or they can be prepared beforehand. You must use a wax paper liner in your pan to avoid sticking in either case!
63. Croutons
Croutons are a tasty addition to any salad, but they can be a pain to make. So if you find yourself with a craving for croutons and no time (or motivation) to make them, don’t fret! You can whip up an easy batch of croutons in no time by making them out of other ingredients you already have on hand, such as rice cakes.
To make a batch of croutons from scratch, start by preheating your oven to 400°F. Next, slice two tablespoons of butter into thin pieces and set them aside. Next, break a cup of plain rice cakes into small bite-sized pieces and put the pieces in a large bowl.
Toss the elements in a tablespoon of olive oil and a pinch of salt to coat them evenly, then spread them out on a lightly greased cookie sheet. Once your oven is heated, place the rice cake pieces inside to bake for about 15 minutes, or until they are browned and crispy.
The next step is to crumble the rice cake pieces into tiny crouton-sized bites and toss them with the thinly sliced pieces of butter. Then place the croutons on a lightly greased cookie sheet, spread out evenly. Bake at 400°F for about 10 minutes or until golden brown, then cool before serving.
You can use this same method to make plain, dry cereal croutons. Just substitute the pieces for bite-sized cereal pieces and follow the same steps. It’s an easy way to make last night’s leftovers into today’s salad topping, snack, or even dinner!
64. Muffins
You can freeze muffins in two ways, either baked or unbaked. This is all about preparing them before putting them in the freezer.
Most people bake muffins when they want to eat them, but some don’t have time for that, so they freeze them. If it’s your first time doing this, you need to know a couple of things before freezing them. This article will help with that.
If you are going to prepare the muffins for baking, then follow these steps:
- Prepare your muffin pan by lining it with greaseproof paper or coating it with cooking spray.
- Combine all the dry ingredients in a large bowl to mix them well.
- In a smaller bowl, beat together all the wet ingredients and then add them to the dry ones and mix them well. Do not overmix.
- Spoon your mixture into your muffin pan and fill each muffin only three-quarters full.
- Bake your muffins in a preheated oven at 400 F for 15 to 20 minutes or until they turn golden brown. If you want, you can also add some grated cheese on top before baking them.
- Once baked, remove them from the oven and cool down completely.
- Place in a freezer bag and store in the freezer.
65. Cookies
When the holidays come around, many people will be making their cookies for family and friends. Rather than making too few or too many cookies, you can make them in bulk and then freeze them ahead of time. Here are some tips on how to freeze your baked Cookies
Steps for freezing cookies:
1. Bake cookies, let them cool down and decorate
2. Let the baked cookies cool to room temperature
3. Freeze the cookies for at least 6 hours or until firm, which makes them easier to pack in airtight containers
4. Place parchment paper in between each layer of cookies in an airtight container that will fit in your freezer
5. Close the lid tightly and freeze
6. The cookies will remain fresh for up to 2 months
7. Remove from freezer to room temperature before serving or packing as gifts
Cookie dough can be frozen in an airtight container (or zip-lock baggie) for up to three months. If you want to bake your frozen dough, just let it thaw in the refrigerator until pliable. Then follow the baking instructions on the packaging for quick and yummy results!
66. Quick Slices Of Bread (Like Banana Bread)
Banana bread is always better on the second day. Why not make two loaves or four? You can store your extra quick pieces of bread in an airtight container (I like Ziploc bags) for several days to enjoy later.
Freezing quick pieces of bread is simple. First, allow your quick bread to cool thoroughly, pack the loaf in an airtight container or freezer bag and freeze. I like to wrap my extra sharp pieces of bread in wax paper and place them in a freezer bag before placing them in the container. It will allow you to remove as many loaves as you like at a time.
To thaw, allow your quick bread to sit out on the counter for about 2 hours (or overnight), and it will be ready to eat. To warm up quicker, place the loaf in a preheated 200-degree oven for 10 minutes or so.
67. Fruit Cake
Fruit cake can be frozen for 6-8 months. However, the freezing process may cause the fruitcake to drop in quality, so it is essential to freeze it properly.
To freeze your fruit cake, wrap it tightly in aluminum foil and place it inside a freezer bag with the air removed. Next, place it inside an airtight container or seal it in foil to keep the fruit cake from picking up other tastes and smells. When you want to eat your fruitcake, remove it from the freezer and thaw it fully before eating.
Fruit cakes have been served for centuries as Christmas desserts or treats throughout Europe and America. They are created with spices, dried fruits, nuts, and molasses. They are often baked in a mold or pan over the holiday season to be eaten later.
68. Doughnuts (Unglazed)
It is best to make your doughnuts the day before you want to fry them, or even two days prior if possible. This allows them to form their delicious flavor and texture fully. If you are very organized, make the dough days in advance, cut out all your doughnuts, store them on a plate in the refrigerator until doughnut day, then cut out your doughnuts and place them on the counter an hour before frying.
If you mess up and do not have time to let the doughnuts rise for the proper amount of time before frying, it is possible to fry them after they have been proofed in the refrigerator overnight.
I am frying unglazed doughnuts immediately after proofing yields very puffy doughnuts with a bit of chewiness. However, I prefer my doughnuts with a bit more crust and texture.
You want to fry your doughnuts the night before, form them into the desired shapes, and put them on a plate or sheet pan. Place the tray of formed dough into the refrigerator until morning time, then allow 20-30 minutes for them to come up to room temperature before frying.
69. Pie (Fruit, Meat, Nut, Sweet Potato, And Pumpkin Are All Okay. DO NOT Freeze Pies With Meringue On Top)
To freeze your pie, let it cool, wrap it tightly in tin foil, put it into a plastic bag, and then put that bag into another plastic bag to avoid any mixing between your pies, which will make one of your pies taste like another. Decide on how many slices you wish to eat (or give away) before freezing; then slice the pie into that amount after it has cooled.
You can place each piece of pastry into separate plastic bags or stack them on top of each other if they are not too large. If the pie is a gift, make sure to print out a label with what it is and the date. Pie can also be frozen without ever being baked.
The easiest way to accomplish this is to buy pre-made pie crusts from your local grocer, put those crusts into a pan, add whatever filling you want, and put that into the oven at 350°F, or whatever the instructions on the crust say.
The baking time will vary depending on how deep you are making your pie, so ask someone who works there if you aren’t sure how long to bake it. If you want to make sure it’s cooked all the way through, insert a knife. If the knife comes out clean, it’s cooked all of the ways through.
You can also buy pre-made filling from your local grocer and pour that into your frozen pie crust instead of making a whole new pie from scratch.
70. Pizza – Reheat At 400 Degrees
How to freeze pizza – reheat at 400 degrees: Slice fresh pizza into eighths, or slice frozen/thawed pizza into twelve equal portions. Then, pop the pizza into a preheated 400-degree oven until it’s bubbling and heated through, about 8 to 10 minutes for fresh pizza or 16 minutes for frozen/thawed.
If you have a baking stone, heat it along with the oven so that it’s piping hot when your pizza comes out of the range. Then, serve piping hot with a cold beer (or glass of wine, if it’s that kind of party).
1. Slice fresh pizza into eighths, or slice frozen/thawed pizza into twelve equal slices.
Note: Reheating multiple pieces of pizza? Arrange them on a baking sheet so they aren’t touching each other (you may want to line the pan with foil, parchment paper, or silicone baking mats to prevent the slices from sticking).
2. Pop the Pizza into a preheated 400-degree oven until it’s bubbling and heated through, about 8 to 10 minutes for fresh pizza or 16 minutes for frozen/thawed. If you have a baking stone, heat it along with the oven so that it’s piping hot when your pizza comes out of the range.
3. Serve piping hot with a cold beer (or glass of wine, if it’s that kind of party).
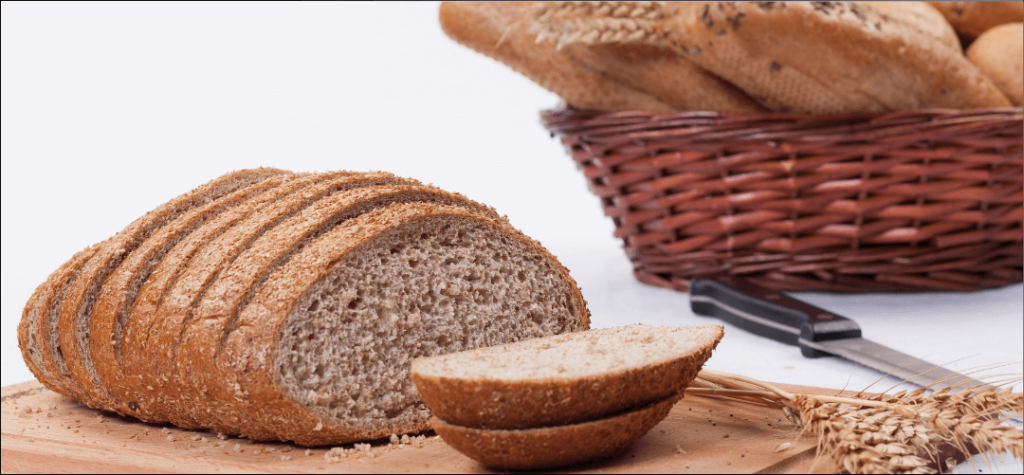
71. Yeast Pieces Of Bread

Cooked and baked yeast bread can be frozen before they are sliced. Freeze them in their finished state — that is, freeze the entire loaf or each slice before you wrap and store it in your freezer.
Freezing the loaves whole will prevent them from drying out; freezing portions individually allows you to remove only as many as you want to serve or eat.
1. Let the bread cool completely, then slice it. Freeze each slice on a baking sheet, transfer them to an airtight container or resealable bag, and store them in the freezer for up to three months. Then, pop the frozen slices in the toaster when you’re ready to enjoy some bread.
2. You can also freeze the entire loaf of bread after wrapping it tightly in plastic wrap and aluminum foil or placing it inside a resealable bag. Try doing this with loaves that have nuts, raisins, or other add-ins to ensure that they stay intact when you defrost them.
3. If you prefer to freeze the bread unbaked, wrap it tightly in plastic wrap and aluminum foil or place it inside a resealable bag. The wrapped loaf should keep for two to three months in the freezer.
4. To make things easier, slice the bread before freezing it. Freezing the sliced bread allows you to defrost just enough for your immediate needs, rather than to need to thaw the entire loaf. Once the frozen slices are toasted, they can be stored in an airtight container in the freezer for up to three months.
5. Refrigerator: Bread in the fridge should be left in its original packaging and kept in a cool area away from foods with strong odors, which could transfer to the bread. Do not store it near raw meat or poultry. You can keep yeast pieces of bread for up to two days in the refrigerator before they start to dry out.
6. Freezing yeast slices of bread is an excellent way to have them on hand for up to three months. Freezing yeast pieces of bread is an excellent idea if you plan a special event and realize that you don’t have time to make homemade bread from scratch.
Before serving, you can thaw the loaves in the refrigerator for 24 hours to 48 hours. Bread that has been frozen can also be stored in the freezer for up to three months, then thawed in the microwave or oven.
7. Pieces of bread freeze well because of their slightly acidic nature; this prevents mold from growing on the bread while it’s in the freezer. However, yeast loaves of bread dry out more quickly than other frozen baked goods because they lack any added fats or oils. You can help keep them from drying out by making sure to store them properly.
8. You can freeze homemade yeast bread dough before you shape it into loaves for an easier way to enjoy fresh bread. Bread dough can be kept in the freezer for up to three months before it needs to be defrosted and baked. It is a good option if you want homemade bread but do not want to spend all day making it or your oven is complete with another dish.
Uncooked Doughs, Batters, And Pastries
72. Pizza Dough – Uncooked
Pizza dough is one of those things that we always make more than we need, and sometimes it becomes a bit of a pain to use up all the leftover dough. So I found this great way to freeze pizza dough so you can enjoy freezable homemade pizza anytime you like!
Preheat your oven to 230°C/450°F/Gas Mark 8. If you are using a baking tray, line it with foil and place it in the oven while it’s heating up.
Form your Pizza! Prep your toppings while the oven is heating up. Your base should be nice and thin but not see-through, about 5-8mm depending on how thick you like it. If you are using a baking tray, make sure it’s oiled all over so the dough doesn’t stick.
Take the pan out of the oven and lay your pizza carefully onto it or a baking sheet. I put all my toppings on before placing them in the oven because it’s easier to get them evenly spread when the base is flat, but you can do this after if you want.
Bake for 10-12 minutes until the base is golden brown but not burnt and toppings are cooked through. Take it out of the oven, let it cool a bit, and cut it up!
Now that your pizza is all done, it’s time to wrap it up! If you are making a few pizzas but don’t want them all in the freezer at once, or if you are cooking one pizza and only want to make some dough for later, this is what you do:
Cut your pizza into slices with a sharp knife. If it’s your first time doing this, you should use a pizza cutter for easier cutting, but go ahead if you are an expert slicer!
73. Pie Shells – Blind Baked (Ready To Fill)
You can freeze pastry shells that have been baked and cooled for up to a month. However, if you’re not going to use them within a day or two of baking them, roll the dough into a ball, put it in a plastic bag, and leave it in the fridge (up to 3 days) before rolling out.
The shells freeze better if they are not filled and decorated. If you want to freeze them with filling already in, prick the base of the surface all over with a fork so it doesn’t bubble up when baking. The main problem is freezer burn which will dry out the pastry, making it very hard after defrosting. The best thing is to wrap them well in cling film, then foil before freezing.
To thaw blind, bake shells from a frozen state, preheat the oven to about 220C/425F/Gas 7, and place a sheet of baking parchment on top of the pie dish before putting it in the shell. This will absorb some of the moisture given off by defrosting. Bake the surface for about 20 minutes or until golden brown, remove from the oven, and calm.
Pie shells can be frozen after baking blind but should ideally not be filled before freezing. They will keep well in an airtight container or wrapped in clingfilm for up to 3 months. Preheat the oven as usual and cook for a further 5 minutes or until golden brown.
Pie shells can be frozen before being baked blind but should ideally not be filled before freezing. They will keep well in an airtight container or wrapped in clingfilm for up to 3 months. Preheat the oven as usual and cook the shell for a further 10 minutes or until golden brown.
74. Cookie Dough – Individually Freeze, Then Place In A Zipper Bag
Another one of my favorite recipes to make is the famous perfect chocolate chip cookie dough. Whether you are making cookies for your family or just to have around, this recipe never ceases to disappear in a flash! Here’s how I freeze the dough, so it doesn’t stick together when defrosting it.
1. Roll pieces of dough into round balls
2. Place on a foil-lined baking sheet
3. Place in freezer for 30 minutes or until solid
4. Place cookie dough balls into a gallon-sized zipper-lock baggie
5. Label the bag with the date, and I also try to write how many cookies are inside as well (I think they make smaller ones)
6. Freezer cookies for up to 3 months
You can take out as many or as little as you want. I like to keep the dough in individual balls to thaw just what I need for baking, without any mess or extra dishes! I hope you enjoy this tip cause it saves me time making batches of these delicious treats!
75. Cake Batter
The desired amount of Cake Batter is ready for freezing. May use any kind of cake batter to be frozen, including cupcakes and muffins.
1. Get the desired amount of Cake Batter ready for freezing.
2. Prepare a container or zip-lock bag to store the Cake Batter after defrosting.
3. Spoon the Cake Batter into a container or zip-lock bag, being careful to remove as much air from the bag as possible when sealing.
4. Place the container or zip-lock bag of Cake Batter into the freezer.
5. Let Cake Batter freeze overnight.
6. Remove from freezer and defrost in the fridge for 24 hours before using, or take it out and leave it to defrost on the counter for an hour before use.
76. Yeast Dough
I receive a common question: ‘ How can I store my homemade yeast dough?’. The provided answer is relatively simple, keep them in the freezer. Before freezing your dough, make sure it has thoroughly cooled! If you try to freeze dough when it’s still hot, you might end up cooking your frozen product when you defrost it.
Make sure the dough is tightly wrapped in plastic and a freezer-safe bag (don’t forget to write down the date and content on the bags). Try to remove as much air from your bag before sealing it.
After that, place all your dough balls into a freezer-safe bag or container and place them inside the freezer. If you like to have your dough in smaller portions, you can use ice cube trays.
Don’t forget to draw out the amount of dough you need before putting them back into the freezer!
There are no limits on how long it can stay frozen inside your deep freezer when it comes to yeast dough! However, if you use the defrosting method of running your dough under cold water, you might need to place them back in the fridge for about one hour before using them.
Remember that yeast dough will expand while defrosting, so make sure to use a big enough container or plastic bag to hold all of it!
The Food You Cannot Freeze
77. Beer

It would be great to drink cold beer in the summer heat. And, stored for future use with a frozen bottle of water in your freezer, it would still be challenging when the time comes to drink it. But is this possible, and if so, how does one go about making this happen?
The answer is yes. You can freeze beer. And when you do, the beer doesn’t taste delicious. The ice crystals that form in the frozen water disrupt the CO bubbles in the beverage when it’s thawed again.-
So you can’t drink cold beer all summer long, and you can’t freeze it and use it later, but if you like beer flavors, you can freeze it and drink it. The CO bubbles will not be disrupted by freezing the beer and later thawing it in a refrigerator; the taste isn’t affected that way.
78. Some Herbs
You can’t always substitute fresh herbs for dried. In most cases, the flavor of dried herbs is more intense than that of fresh herbs, as some water-soluble flavor compounds are lost in the drying process. Also, some delicate spices lose their flavor when they are dried. However, you can use them as a general substitute in most recipes.
Basil: Use 1/3 as much of the fresh herb as you dry.
Bay Leaf: One large bay leaf equals three small leaves or five smaller ones. The giant leaf will give a more robust flavor, so use it accordingly.
Parsley: In cooked dishes, ¼ cup of fresh parsley leaves can be substituted for one tablespoon of fresh chopped parsley. In salad recipes, use only the leaves.
Sage: Fresh summer or winter sage has a mellow, sweet flavor that is very different from dried. If using dried sage, add half the amount because it’s stronger.
Thyme: Fresh and dried thyme can be used interchangeably in most recipes. The summer and winter thyme flavors are different, but they cannot be distinguished once dried.
79. Fresh Salad Greens
You can’t freeze Fresh Salad greens. You can, however, preserve the freshness of your lettuce by storing it in a plastic bag with some moisture to keep it crisp until you are ready to use it.
Lettuce is a highly fragile plant that requires perfect conditions during all phases of its growth. The leaves have pores that are immediately open when exposed to heat. However, when exposed to cold, they will constrict, so the lettuce must be kept in a moist environment to retain its crisp appearance once you’ve cut it.
Many people find that if they wash their lettuce and spin it dry just before cutting, then wrap the leaves in a moist paper towel and store them in a plastic bag. The lettuce will remain fresh for up to a week.
You can shred the leaves first (the smaller they are cut, the faster they will defrost), or you can chop them into pieces. You should use an airtight bag and squeeze as much air as possible out of it before sealing it. It is important because the bag will freeze in a solid block, and if there is too much air in the bag, you won’t be able to break it apart without tearing the bag and damaging your lettuce.
80. Dishes With Crumb Toppings
Only use this topping for dishes you eat immediately or share right away. Dishes with crumb toppings don’t freeze well because the crumbs will get soggy and make your container look old and boring. It’s like putting bread in a hot dog bun, it’s only good until lunchtime, and then it becomes nasty mush.
The best times to use crumb toppings are when you’re going to eat the dish right away or share it with someone. Unfortunately, this topping doesn’t freeze well because the crumbs will become soggy and make your container look old, weird, and crappy. It’s like putting bread in a hot dog bun; what’s good until lunchtime is now nasty mush.
Use crumb toppings if you want to make your dish look old, weird, and crappy. But if you don’t want to make your container look old, mysterious, and crappy…please don’t do that.
81. Deep-Fried Food

Deep-frying is a cooking process whereby food is submerged in hot oil or fat and cooked until it becomes crisp. In an oven, the food itself produces its heat for this amount of time as the hot air around it cooks the exterior. As a result, deep-fried foods are usually fried at higher temperatures than those used for most other types of frying.
The main reasons are not having enough oil or too much water. If you put food items into the freezer, they will freeze and thaw at least once before serving them to your guests. The oil will break down during the freeze-thaw process, which will cause more absorption by the food.
Foods high in fat content, such as French fries, can absorb more oil than foods with less fat content because the surface area of the fare increases when you cut it into small pieces after cooking.
82. Yoghurt
When milk is turned into Yoghurt, the bacteria culture consumes the lactose in milk, sugar. This process changes some of the proteins and forms a gel-like substance around solid chunks of milk protein. The gel that forms around these chunks traps most of the liquid portion into a semi-solid product with bacterial cultures suspended throughout it.
When this semi-solid product is frozen, the chunks of milk proteins freeze first and then create small spaces for the water to freeze into. As a result, it causes ice crystals to form within the semi-solid product, damaging cell walls.
The damage weakens the gel structure allowing even more liquid to separate from solid pieces leaving a soft mushy mess when thawed out. However, the bacterial culture does survive the freezing process and will begin to re-grow when thawed.
83. Jelly
You can’t take Jelly out of the fridge and expect it to be Jelly still. It will become a solid like ice or rock. That does not mean you cannot use frozen Jelly as an ingredient in other things, though, such as making trifles or smoothies.
We know that water gets colder as it goes down the Thermos and that hot water will turn into cold water as you let it sit. This is why we can use frozen Jelly in recipes that call for jelly cubes.
Jelly is a semi-solid mixture of sugar, fruit juice, and gelatin. The proteins in the gelatin are what cause the change from liquid to solid. I.e., Jelly turns solid at room temperature because the protein molecules are too big to be liquid anymore.
The Jelly is still wet inside, but it cannot pass through the semi-permeable membrane of cells, so it remains outside the cell, being squeezed out by capillary osmosis until enough water has been forced out that the Jelly can no longer flow freely. The molecules are still small enough to move around quickly. They are not bound together enough yet for the Jelly to stay rigid.
The trick is that if you poke a hole in the cells, the Jelly flows out again and is wetter than before. Also, since it takes up less volume as a solid than as a liquid, it will shrink to fit into the container if you squeeze the Jelly. Finally, if you freeze the Jelly quickly enough, ice crystals can form inside the cells, making the Jelly even more rigid than before.
It is why when you let the ice cream melt, it becomes less solid, but if you leave it in a warm place for long enough, the ice crystals melt entirely, and you are left with a liquid again.
The problem with frozen Jelly is that it melts into a puddle in your hand because water doesn’t get any colder, ever. Freezing does not make the water molecules lock together to become more solid; it makes them move around less freely, taking up less volume.
Other
1. Pesto sauce
Pesto sauce is a delicious winter treat that helps brighten up otherwise bland meals. However, pesto can be expensive to buy! Luckily, it’s easy and inexpensive to make at home.
To freeze pesto sauce, here’s what you will need:
- Time (approximately one hour prep time, including clean up)
- A blender or food processor
1. Prepare your ingredients – You’ll need a cup of fresh basil leaves, three cloves of garlic (or one tsp. garlic powder), one cup of grated Parmesan cheese, and two cups of olive oil.
You’ll also need half a cup of pine nuts or walnuts and salt and pepper to taste. If you want your pesto sauce to be green like pictured, leave out the nuts until after you’ve put it in the freezer; otherwise, you can mix them in now.
2. Put your nuts (if using) and 1/4 cup olive oil into a skillet over medium-low heat for ten minutes, occasionally stirring to make sure they don’t burn. Let cool completely before putting it into a blender or food processor. You’ll be making a paste for your pesto sauce similar in texture to nut butter.
3. Add basil, garlic, and cheese into your blender or food processor and pulse until combined (do not purée). With the motor still running, gradually add olive oil.
4. At this point, you can serve it right away if desired, or you can put it in the freezer. To freeze your pesto, transfer it into a freezer-safe container with an airtight seal (like Tupperware) and leave an inch at the top to allow for expansion during freezing. Freeze for up to six months.
5. When you are ready to use your pesto sauce, thaw it overnight in the refrigerator or on the counter until it can be scooped. You may need to add more olive oil before serving if it has dried out too much during the freezing and thawing.
2. Wine (Freeze In Ice Cube Trays For Use In Sauces)

Wine is a go-to ingredient if you add depth and character to sauces or soups. However, if you don’t use it all in one serving, the chances are that the rest will be forgotten and end up going bad before you find the time to use it again.
Of course, you can always drink what’s left (if there’s any), but if you prefer to use it in cooking, why not simply freeze it? Here’s how to do just that:
Steps for the Freezing ProcessF
1. Pour leftover wine into ice cube trays until complete. Make sure you leave some space at the top of each tray so that the cubes can expand without spilling or overflowing.
2. When you’re done, place the trays in your freezer.
3. Let them freeze overnight (or until solid).
4. Remove the cubes from the trays and put them into an airtight container or Ziploc bag (the latter is better because it’s easier to seal shut). Make sure they are not touching each other.
5. Return the cubes to the freezer until you need them next time.
Be sure to use your frozen wine cubes within a month or two after making them, as they tend to lose their flavor and can even go rancid if stored for too long.
Feel free to pour leftover wine into ice cube trays and only thaw out what you need next time if this sounds like a hassle. However, this method is not as effective in preserving wine, so use it only if you will be using the cubes within a few weeks.
General Tips For Freezing Food
Freezing is a great way to preserve food for extended periods. Not only does it allow you to buy food in bulk, but it also keeps the flavor and texture of your fruits and vegetables.
However, some people find that they’re not sure how to best freeze foods or whether the freezer is safe for particular items. So, here are some general tips for freezing food.
First, you’ll need to determine which items are safe to freeze and how long they can be preserved in the freezer. Generally, most fruits that have been picked after at least two months of cold weather are considered safe for freezing if they’re first treated according to USDA guidelines.
It means being washed with a germicidal soap, rinsed in a mild bleach solution, or soaked in ascorbic acid or lemon juice to inhibit browning.
Fruits that are safe to freeze include:
- Apples
- Apricots
- Berries (except cranberries)
- Cherries
- Citrus fruit
- Dates
- Figs
- Grapes
- Melons
- Nectarines
- Oranges
- Papaya
- Peaches
You will then want to ensure that your fruit is cold or flash-frozen before storing it in the freezer. Otherwise, bacteria and fungus may grow, and your fruit won’t last as long.
Here are some vegetables that are safe for freezing:
- Asparagus
- Beans (except kidney and lima)
- Broccoli
- Brussels sprouts
- Cabbage
- Carrots
Vegetables must be well cooked (especially green beans) before being frozen. It will ensure that bacteria and fungi do not grow during the freezing process or when you thaw the food out to eat.
Finally, if you’re looking for guidelines on whether you can freeze certain foods like meat, dairy products, or grains.
Generally speaking, you can freeze these items if kept in airtight containers after being well wrapped. However, you’ll also want to keep your freezer at 0 degrees F or below so that the food doesn’t spoil.
When you are ready to use frozen items, it is best to thaw them out slowly in the fridge to prevent bacteria from growing. In general, you should keep your freezer at 0 degrees F or below to prevent bacteria from growing and spoiling your food.
When you are ready to use frozen items, it is best to thaw them out slowly in the fridge to prevent bacteria from growing.
Best Surprising Foods You Can & Cannot Freeze – Summary
The article provides a list of 83 foods that can be frozen. The list includes both raw and cooked foods and fruits and vegetables. The report also provides a few tips for freezing food, such as blanching vegetables before freezing them. Moreover, some foods that cannot be frozen are also included.
While most foods listed, either raw or cooked, can be frozen and stored for later use, some should not be frozen. One primary reason is that they lose a large percentage of their nutritional value when frozen.
To name a few: carrots, celery, eggplant, kale, spinach, and potatoes lose a significant amount of their antioxidants when frozen, as well as the antioxidants that are lost if they are cooked and then frozen.
Another reason to avoid freezing foods such as celery, eggplant, kale, and spinach is that they tend to toughen up when they thaw out. One exciting tip stated in the article is that it is best to freeze the vegetables before they are fully ripe.
Other foods that can be frozen include bok choy, cabbage, broccoli, carrots, cauliflower, cucumbers, green beans, herbs (basil, oregano), leeks, and onions that have been chopped into rings or diced for future use.
One of the foods that cannot be frozen is chocolate. That’s right, although it can be safely stored in the freezer for up to six months, the quality of the chocolate is altered when it melts and then refreezes after being taken out of the freezer. This alteration results in a change in texture and flavor.
Sour cream, yogurt, cereal, bread, and baked goods cannot be frozen as they lose a significant amount of their flavor after being exposed to cold temperatures.
In conclusion, most foods can be frozen for later use. However, foods high in antioxidants or those that may toughen up when exposed to freezing temperatures.
| The content writers’ team at ElmundoDeals is continuously contributing to the writing of high-quality content regarding Making Money, Saving Money, Product Reviews, E-commerce, Affiliate Marketing, Banking & Investing, as well as looking for the Best available Deals. |
Latest Posts
- How To Cancel Orders On eBay As A Buyer? – A New Buyer Guide To Cancelling eBay Transaction
- A New Seller Guide To Cancelling eBay Transaction – How To Cancel Orders On eBay As A Seller?
- 56 Real Ways To Make Money Quick In 2022 And Beyond – Online & Offline
- How To Make Money On Fiverr In Short Time: Ultimate Guide To Help You Startup
- 60 Of The Best Affiliate Programmes Paying The Highest Commission